by Iain Ripo
All photos: the author
Sleeper spacer
I was intrigued some time ago by the subject of sleeper spacing & how much difference this can make visually. My first effort was to use a photo of a Mark 3 coach (which is 75’ long) and count the sleepers beneath it. I found that this was 27 as opposed to 29 on Peco streamline under a Lima Mark 3. With a little experimentation, I cut a tool from a length of plasticard which resembled a comb to hold the sleepers apart. Being hand made, it was a little crude but produced the desired effect. I thought that OO being too narrow may require these spacings to need adjustment, but it seems to look acceptable to me. Real sleeper spacing seems to vary a little too.
Closer 6’ way gauge
Like many, I had been laying track for years using Peco’s Streamline dimensions and considered these to be standard. I always feel that on the prototype, the 6’ looks only a little bigger than the 4’ but in model form, it looks a lot bigger. I became increasingly unhappy with how this looked. We all know that OO is inaccurate so I could not just make the gap between the adjacent rails 24mm. I had to work out the difference between track centres. I have published these calculations in a previous Journal but, without repeating them, I found that the standard OO track gauge was about 5mm too wide. This may not sound like a lot, but rolling stock is wider than the track gauge so it becomes very noticeable. I first started by cutting a commercial gauge to remove 5mm from it and have progressed from there.
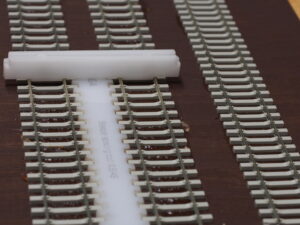
The bottom spacers are for a more realistic 6’ way, with 9.5mm sleeper centres on the left and 8.5mm on the right. The spacer at the top is for Peco Streamline 6’ way and 9.5mm sleeper spacings, but the track below it has sleepers spaced at 8.5mm.
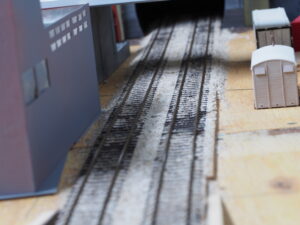
A different angle for comparison. The left & middle tracks have the sleepers spaced at 8.5mm centres instead of the 7.8mm of commercially available HO/OO track on the right. 0.7mm does seem to make a difference. The gap between the middle & left tracks is 5mm narrower than Peco Streamline which I had, like many others, been using for years. I do not think the difference looks very noticeable here. The 6’ way gauge across the tracks also has side profiles for platforms with coping. The sleeper spacing gauge also helps the 6’ way too.
A few years later, I needed some bullhead track. This had sleepers spaced out a little differently and it made me aware that not all UK track is the same. Track on main lines often has sleepers a little closer together than in sidings or on less heavily used lines. This was something I had never noticed before. I therefore cut another spacer with the same dimensions as available bullhead track, so I could space flatbottom out at this too.

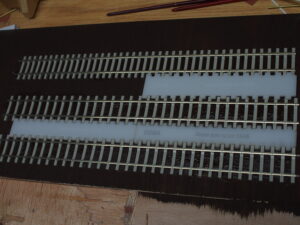
These left & middle tracks have sleepers spaced at 9.5mm centres, compared with standard Peco streamline on the right. I originally made sleeper spacing tools by cutting them from plastikard, but after buying a laser cutter, I realised I could make the tools more consistently & repeat them. I was very pleased with the visual difference. There is an important consideration though: Model railways often use curves which are a lot tighter than the prototype and we expect at least most of our models to run everywhere. Reducing the 6’ distance by 5mm means you have to be very careful on curves to prevent collisions between passing stock. The scenic section on my layout is quite straight so this was not a problem for me.
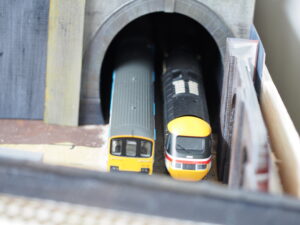
I feel that the 5mm difference in 6’ way looks more noticeable on longer sections of track. It becomes even more noticeable when viewing passing trains. This is the sharpest curve on the scenic section of my layout, so gauge clearance around curves is not a major issue for me. It will be an issue for many though.
It occurred to me that these are tools specific to OO gauge, so who better to circulate them than the Association? With this in mind, I took some early tools to an exhibition to share the ideas with fellow association members. I was overwhelmed at their enthusiastic response. I have refined these early tools and am happy with those in the photos. They should be available very soon.
Conductor rail tool
I remember seeing a layout photo somewhere with a centre conductor centre rail which was nowhere near the centre of the track. This gave me the idea that some form of jig would be useful to ensure the rail was laid at a consistent distance and height from the running rails.
I made this remark to a friend who designed a conductor rail aligning tool in 5 minutes. I need to work on this and decide on some compromises. Conductor rails should sit higher than running rails, but this makes cleaning the track difficult & they could foul some rolling stock.
I have designed most of these to dimensions which are useful for my own layout. I would not advocate these as being definitive, but they work for me. If they give other modellers ideas to be creative, then I think this is a good thing.